Monday, January 30, 2012

Lollipop Crafts #65

Aloha from CHA everyone!!
Hope you are all enjoying your Monday.  Today is the 2nd day of CHA, I hope to post some pictures soon of what we've been up to since Friday.  If you are attending CHA, please stop by the La-La Land Crafts booth #1780 and say hi!

This week's Lollipop Crafts challenge #65 is Anything Goes.  Woo Hoo!!  Everyone's favorite right?  Well at least it's my favorite.  :)  So for your project go crazy or go CAS.  Whatever you want to create make sure you link it up with us.  For some inspiration from both the A and T Teams head on over to the Lollipop Crafts blog.

Today I wanted to share my finished card featuring Wryn - Close to my Heart, from Tiddly Inks.  Now if you remember I posted a picture of her colored up (here) and was going to post when I finally put her on a card.  Well after much deliberation with layouts, papers, etc...  I finally finished and here it is.  Please be kind!! :)


So what do you think?  I really like how it turned out.  I know it's pretty busy, but I think she needed those big flowers and the black & white theme with the touch of red.  I couldn't really see her anywhere else.  LOL.  The card itself is black cs, the dp are from an old paper stack from Making Memories that I remember buying from Target.  The red is Stardream cs in Jupiter that I bought a few years ago from Kelly Paper Company.  On the left side of the card you can see a very familiar ribbon. Yes, it is actually one of my favorites and I did a fun little double bow. Dangling from the bow are two hearts. I drew in the pattern using Copics R46 and RV000, then I traced over it with a white gel pen (Sakura). The string is red embroidery floss.  Here's a close up of it:


I cut apart the sentiment and mounted each word on to the same red cs. It's my first time doing that, and I really like how fun it looks.

Wryn - Close to my Heart
Alrighty, now it's your turn.  Create a project and link it up on the Lollipop Crafts blog under challenge #65.  We don't have a sponsor this week but you can still be in the running for our top 3!  Looking forward to your projects! 

Mahalo for stopping by.  Let me know what you've been doing while I'm at CHA.  Hoping to post some pictures soon. 

Hugs,
Leanne

Wednesday, January 25, 2012

Flutter By Wednesday #187


Happy hump day everyone!!
I'm so excited, tomorrow night, Renate and I are packing up her truck and trekking down to Anaheim.  For vacay?  Nope, we're going to CHA!!  Yeppers, this will be our 3rd time at CHA with the awesome duo of La-La Land Crafts, Eric & Irina.  If you are going to be at CHA I hope you can stop by our booth (#1780) and say hi.  I am looking forward to greeting some old friends, meeting new people and hopefully getting to put some faces to some of you who will be attending.  I'll try to post pictures as often as I can.  But don't be surprised if I'm MIA for several days.  I'm pre-posting so I don't miss any DT deadlines, but commenting will have to be put on hold.  Sorry in advance!  :)

Okie dokie, now back to our regularly scheduled program...  This week's challenge over at the Flutter By Wednesday blog is all about EMBOSSING.  Use any sort of embossing technique on your card/project along with your butterfly, fairy, or angel.  Once you are done creating head on over to the FBW blog and directly link up your photo to challenge #187 using the Inlinks button at the bottom of the post.  For more fluttery inspiration please visit the talented FBW ladies by visiting the Flutter By Wednesday blog.


For my card I used Yoshimi, the newest addition to the Sister Stamps line.  I went pretty CAS even tho there's a lot of color going on.  I colored her with Copics, but also paper pieced her kimono and hair ribbon.  The origami paper (Aitoh) has a really pretty butterfly and sakura pattern.  I dry embossed the white cs using a cherry blossom branch embossing folder (Cuttlebug).  I added a MS butterfly and also some pearls which I colored blue.  The sentiment is from TGF (OA-Happy Day)  
Yoshimi
Alrighty friends, hope you can play along with us this week.  Remember to use the emboss technique on your project/card and don't forget to add a butterfly, angel or fairy.  Mahalo for stopping by!  Have a terrific Wednesday and happy fluttering!

Hugs,
Leanne

Supplies not listed above:
Red cs (Bazzil), Black & white cs (Recollections), blue shimmer paper (DCWV- Linen closet cs matstack), cream pearl pen.


Monday, January 23, 2012

Gong Si Fa Cai, Xin Nian Kuai Le!

(Second post today, please scroll down for my Lollipop Challenge #64 post)

"Wishing you prosperity, Happy New Year!"


Here's a Chinese New Year card featuring the Lion dancers from Sister Stamps.  It's the year of the Dragon so if I squint my eyes it will look like they are carrying a dragon, not a lion.  (lol)  I kept it CAS and gave the dragon/lion some really fun and bright colors.  (I actually saw a picture of a dragon with these colors on Google after I colored it up.)  I used two embossing folders (Cuttlebug-Asian themed) and circle Spellbinders for some awesome background and texture.  Added some orange glass beads to the corners making sure not to put 4, as 4 is unlucky in the Chinese culture.  Not sure if you can see it, but I stickled the red/yellow parts of the dragon/lion.  The sentiment is hand written and the translation I found also on Google.

Dragon/Lion Dancers
May this year bring you prosperity, joy and serenity.  Xie Xie for stopping by today!!  Have a great day!! 

Hugs,
Leanne

Supplies not listed above

Lollipop Crafts Challenge #64

Good morning!!

For those of you celebrating the Lunar New Year today, Gong Xi Fa Cai!  Wishing you all the best for the New Year!!

We have a new challenge over at Lollipop Crafts.  This week's challenge #64, "Wing It," should be very fun.  You have to have something with "wings" on your project.  Use a butterfly, angel, fairy, bees, etc... to qualify for this week's prize as well as showcase in our top 3.  This week's sponsor is Robyn's Fetish.  Need some inspiration to get your creative juices going?  Well pop on over to the Lollipop Crafts blog and feast your eyes on the designs from the T-team.

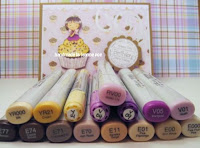
My friend's daughter is having a birthday this week so this was a perfect opportunity to ink up one of my new birthday stamps.  Here's my card featuring Fairwee Josie and she's celebrating with a huge cupcake with sprinkles!


Isn't she cute?!  She's just one of 6 new Birthday/Party Fairwees waiting for you to come by and pick them up.  They will bring so much cuteness and fun to any project.  Now for my card I went pretty CAS with this one.  I found some wonderful patterned paper (DCWV The Glitter Sweet stack) and the rest was white and kraft cs (Recollections).  I paper pieced the cup holding the cupcake with a scrap of dp.  The rest of the image is colored with Copics and Stickles.  I matted the dp on to white cs and used a (S/U) scalloped border punch to accent the top and bottom of the card.  The sentiment is one of the new sets from AmyR.  I stamped it with Rich Cocoa ink and matted it to a kraft scalloped circle (S/U).

Fairwee Josie with Cupcake

Alrighty, now it's time for you to come and play with us.  Want to be in the running for the prize, then please make sure to follow the challenge theme, we want everyone to be considered for the pize as well as the top three, so please follow the theme.

Mahalo for stopping by, can't wait to see what "Winged" creations you come up with.

Hugs,
Leanne

Supplies not listed above:
Memento black tuxedo ink


Friday, January 20, 2012

Lilo's Fun Friday #15

Good morning and Happy Aloha Friday!!
Woo hoo!!  Who else is ready for the weekend besides me?  I bet we all are right?  Are you doing anything fun?  Well if you you are, I hope you share. :)  As for me, hopefully it will be a relaxing weekend.  Maybe get some crafting in that's not DT related or watch a movie or paint a wall or four.  (hehehe)

Anyhoos, enough rambling!!  Today for my Fun Friday share I used a new image from... Sister Stamps, release #5!!  Yay!  As you know I recently received some happy mail this week, I needed another Thank you card for a guy so it was easy to choose  to ink up cutie Keitaro.  He's one of 3 new valentine images from Sister Stamps and he is adorable.  (For more info on the new release and where you can buy the stamps head on over to the Sister Stamp blog.   ATS is now carrying them as well).


Keitaro card with origami heart & samurai hat
  
Jenny's sister really did a terrific job with Keitaro.  The details are awesome!  I love his samurai hat and the origami heart.  I had to try to make them myself!  I did go online and searched for links to make origami hearts and a samurai hat.  I love origami.  So many cool things you can make with one sheet of paper.  I found a website with free downloads of instructions.  If you're in the mood to paper fold click HERE to be directly linked to Origami That's Fun & Easy.  I used mulberry paper to make the heart and samurai hat. Here are a few pictures of the card...

Sentiments read: Domo ARIGATO Gozaimasu!  Thank you very much!

I love the chain of hearts too!  Can you see I spelled out ARIGATO inside the hearts?   It was a really nice surprise that I could fit that inside.  Me likey!  Now I wish I knew how to make one of those heart chains.  I guess I could Google  or You Tube it and maybe I will once I have more time.  Used a Cuttlebug embossing folder for the backdrop and some origami paper to accent behind Keitaro.  For my layout I used the Desconstructed Sketch #35:


Here is a close up of the bottom part of the card featuring the sentiment.  I cut out a paper heart and added some blue ribbon to mimic the top of Keitaro's hat.  Hand wrote the sentiment on kraft cs and mounted it on to some of the same origami paper.


Paper heart cut out on the sentiment, see the cool zig-zags,
I used pinking shears for that!

ARIGATO!

I love how it looks like he's on a banner.  I cut a small strip of kraft and adhered it to the bottom to break up it up so as to follow the sketch.  I had a hard time with his hair.  I know it's only a small space to color, but my E29 was giving me problems and I really didn't want to color all over again.  No biggie for me so I left it.  See the zig-zags on the bottom?  I used pinking shears for that!  Hey you can find lot of craft tools if you just use your imagination.  :)


Alrighty, time for me to sign off.  I hope you enjoyed my share for today.  Have a terrific Friday and Domo Arigato Gozaimasu for stopping by!!  (hahaha!)

Challenges:
ATS - Color challenge
Deconstructed Sketch - #35

Hugs,
Lilo


Supplies not listed in post:
brown memento ink, dark brown cs, kraft cs, Xpress It paper, blue paper ribbon


Thursday, January 19, 2012

Love you Larry

Hello Everyone!
Today at the Lollipop Crafts blog, the T-Team is showcasing digis from our sponsor, Digital Delights.


The owner, Louby Loo had this to say about her cute digi store:
 "Welcome to Digital Delights by Louby Loo.  A magical palce filled with digital creations from all walks of life.  We are your  one stop shop for all your digital stamps and digital products which are instantaly downloadable.  We also have a wide range of digital papers and svg cut files for all your crafting projects.  Our low prices reflect out belief that crafting should not only be fun but affordable too!  Other services include custom blog design and custom watermarks.  Why wait for snail mail?  Start creating with our instant downloads today."
Digital Delights is offering the following prize for this week's NO EMBELLISHMENT challenge #46:


For my team's inspirations make sure to stop by the Lollipop Crafts blog.  Since this week's challenge #46 is no embellishments, I thought it would be cool to use my punches for this one.  We were given a couple of images to use for today so I chose to use this cute image called Love you Larry.  Isn't he sweet?!  >.<


I colored him up at my crafty bud, Renate's, and got a chance to use her Prisma colored pencils.  I used reds & blacks for Larry, sorta giving him a gentlemanbug (as opposed to a ladybug) shell.  (hehe)  I also colored in the background with reds and after going over it with some baby oil I used a white Sakura gel pen to add some white dots.  I fussy cut the heart out and then matted it to black cs then fussy cut that out. Love how it looks 3-D, but it's actually not.  (hehe)  Working on those shadows really helps with the illusion.  I used a scrap piece of red & white dotted paper and was pretty stoked that it somewhat matched the inside of the heart.  The other dp is gray and white and was perfect as a subtle backdrop.  I inked up a dollar sentiment stamp in white, stamped on to black cs then embossed with red embossing powder.  Love how the red looks on the black background.  I also matted the black cs to red cs.  Added several punched hearts here and there to break up the red dp and another small one on the sentiment .  I cut out the LOVE sentiment that comes with the image and matted it to a scrap of black cs and put it on top.  I colored that one with R46 (Copic) and dotted it with the same white Sakura gel pen.  So love how it turned out.


Alrighty, I hope you have a chance to play with us this week.  Just link up your project minus embellishments to the challenge post from Monday for a chance to win the $5 voucher from Digital Delights.  Mahalo for stopping by today.  Be sure to come back tomorrow for Lilo's Fun Friday #15.  I hope to share one of my new stamps on a card.  :)

Have a good one!
Hugs,
Leanne

Wednesday, January 18, 2012

FBW #186 Anything Goes!

Happy Wednesday!!
Are you ready for a new challenge with the Flutter By Wednesday team?  Well it's everyone's favorite, Anything Goes!  For some awesome inspiration from the DT and details about this week's challenge head on over to the FBW blog.

Today I am sharing an easel card/calendar I made using the cute Rainbow Dreams Pixie from Tiddly Inks.  First let's start out with the front of the card.  I used one of my favorite WRM dp.  I punched some white clouds (Fiskars) and used Copics to color the image and clouds.  O look, there's a butterfly who wanted to be in the picture!  She's also colored with a Copic marker and decorated with cream Viva pearl pen dots.  ;)

Here are a couple pictures of the opened easel card/calendar.  I used some of the same dp to mat the calendar which was part of a RAK I received from my LPC sista, Cyndi.  :)

Front View
Side View
 Alrighty, if you're ready to play along all you have to do is make sure you use a fairy, butterfly or angel in your project and link up with us HERE.


Mahalo for stopping by!!  Have a great day!  :)

Challenges:  Tiddly Inks #68 - Color challenge

Hugs,
Leanne

Supplies not listed above:
Corner rounder punch (Fiskars)
Martha Stewart butterfly punch
White Neenah cs


Tuesday, January 17, 2012

Happy Mail!

Hello!  Sorry I don't have a card to share today, but I do want to share something I colored.  Still thinking how I wanted to put her on a card, but for now there is no card/project completed.  I do have some happy news, well at least happy for me,  I receive some of my new stamps and I really can't wait to ink some of them up.  Look for something new on Friday.  (happy dancing!!) 
 
Wryn - Close to my Heart  (Tiddly Inks)

This is Wryn - Close to my Heart, one of the new, sweet images created by Christy Croll at Tiddly Inks.  Some of you might know that I love to, occasionally,  use different colors for hair.  Wryn's got some really pretty locks and I wanted to try something different.  So here she is with a Blue Violet do.  I sparkled up the heart and wings using a clear glitter Sakura gel pen.  For the dots on her dress I used a white Sakura gel pen and once it dried I went over it with R46.  Let me know what you think. 


Okie dokie, I've gotta finish up my card for this week's Flutter By Wednesday challenge and then write up my post.  If I finish early and don't pass out, I'll stop by to oohh and ahhh.  Have a good evening/morning for those in the UK.  Mahalo for stopping by!! 

Hugs,
Leanne

Copics:

Monday, January 16, 2012

Helping out a friend

Hey everyone!
I'm calling out for supporters on behalf of Danni to help a little girl who's going through a tough time right now.  Do you have a card or two that you created that you would willing send to brighten a little girl's day?  I know I have some that are just sitting in a box waiting.  I'm sending mine off soon as Danni needs them as soon as the postal service can get them to her.

For the full details as well as how you can help please visit Danni's blog post HERE

Mahalo in advance for giving!  ;)

Hugs,
Leanne

Another Cupcake Leslie card

Afternoon everyone!
Just got back from a yummy lunch with my co-worker and almost forgot that I didn't post the card I made last night.  So here's another card I made using Cupcake Leslie from Karber Digital.  I used up a scrap of dp and a pretty easy layout.


Ayeee!  She is sooo cute!  I don't know why I haven't used her til now?!  I love her red glasses, a la "Sally Jesse Rafael."  (haha)  I have a couple other Karber digis that I would like to get onto a couple cards so look for those in the future.  The sentiment was computer generated, and the border was created with my newest MS border punch. 


Alrighty, that's all for me today.  Hoping you have a terrific Monday!  Be sure to head on over to the Lollipop Crafts blog today for this week's challenge and inspirations by the A-Team.  Digital Delights is our sponsor.  Be back on Thursday for my spotlight post on our sponsor.

Mahalo for stopping by!

Hugs,
Leanne
Copics:
E74, 77, R46, N2, R00, E50, E51, E01, E11, E71, E93

Sunday, January 15, 2012

Cupcake Leslie

Hey, I'm back and this time I'm a bit early.  I hope you're having a good weekend.

I have a fun and cute card to share today.  It's pretty CAS and I'm liking it immensely.  I used a Karber digital image that I purchased when Berenice first started her online business.  My card features Cupcake Leslie.


This little girl is so darn cute with her big head and glasses.  I also adore that the cupcake has a face too.  Hopefully Leslie isn't too hungry right now.  It would be a shame to chomp into that cupcake.. lol  Yes, that is a balloon or my rendition of a balloon.  I used two circle Spellbinders and a small heart punch.  The "ribbon" was drawn in with a white pencil.  The dp is scraps from my scrap bin.  The sentiment is from a retired set from TGF.  I used the white pencil to add a subtle border to the kraft card edges.  Pretty CAS.

Cupcake Leslie

Okie dokie, have a super awesome Sunday and if you have Monday off enjoy it.  I don't, so I'll be at work.  Mahalo for stopping by!

Hugs,
Leanne

Copics:


Saturday, January 14, 2012

Arigato Miyono

Hello!  Yep, this is a late post.  I've been enjoying the day catching up on commenting on the awesome Tiddly Ink blog hop, some laundry, watching some Hallmark Channel movies and now some re-runs of Glee!  Well at least listening to it in the background while cleaning up my craft table. :)  If you haven't had a chance to join in the hop at Tiddly Inks you should.  It was totally fun to hop and be part of it.  I'm pretty sure if you head on over you'll pick up a few images from the shop.  They are definitely too cute not to pick up!   I wanted to Thank those of you who've stopped by to leave me really lovely comments.  It makes me smile and I enjoy reading them all.  Also hello to those new to my blog.  Welcome and I hope you get some inspiration from me.  :)

Keeping up with one of my 2012 craft resolutions to try and post everyday is pretty fun.  I think it doesn't matter what time you post as long as you do.  So here I am at 4:35 pm listening to Brittany sing a Britney Spears song typing up this post.  (lol)  Well if you can't tell by the title I am going to share another Thank you card featuring Miyono from Sister Stamps.  I think it's one of my favorite hair colorings so far.  I really enjoy coloring an image when it's stamped with brown ink.  You can't really use too many colors, but it definitely looks softer to me. 


I added some fun washi paper fans that I punched with a fan punch.  I used 6 punches for this card. There are 2 flower punches, the oval punches for the sentiment, a sun punch and the fan punch.  I forget that I have them sometimes.  I'm going to add using punches to my craft list.  I have too many that don't get used.  They add such a nice accent don'tcha think?  :)  Sorry I don't really remember what I used on this besides the punches and stamps.  Sorree!!  That's what I get for not writing down colors or papers.  That's why now I'm taking picture of everything!  Another crafty resolution.  My crafty resolutions are go as I encounter.  lol.  What's one crafty resolution you have?  Maybe I can add that to my list.  :)

Miyono from Sister Stamps

Here's a close up of Miyono.  I seriously don't know which of these cuties I like more.  Alrighty, going to sign off for now and start making a new mess!  hehehe.  Have a great Saturday evening my friends!!

Hugs,
Leanne

Sentiment: TGF retired set

Friday, January 13, 2012

"Friends are the Flowers of Life - Tiddly Inks Blog Hop".

(This is my 2nd post today, if you'd like to see my Fun Friday project just scroll down.)   :)

Hello!

Today I'm hopping along with Tiddly Inks and all of their fans.  I hope you like what I made using one of the new Wryn stamps created by Cristy Croll.   For a full list of all the hoppers head on over to the Tiddly Inks post titled "Flowers" and start hopping.  Now because I'm sure there will be lots of friends playing in the hop I'll make this a short post.

I used Wryn and the Friends are flowers sentiment for my card.  I altered the image so that the sentiment was actually underneath her borrowed wand as if she was sprinkling fairy dust onto the flowers. 


I'm so bummed about parts of the card.  I actually printed this out twice and paper pieced the colored parts on to the second one.  I'm bummed because some of the glue squished out and when I attempted to clean it up it smudged, so please pretend that's supposed to be there.  lol.


Here's a shot of the wand sprinkling the dust to make the flowers grow.  I used Stickles for the dust and made sure to sprinkle some on to the heart flowers and some on the ground.  Okie dokie, now you need to hop on back to the Tiddly Inks blog to see who your next stop is.  I'm almost positive you will squeal! 


Have a great time and don't forget to leave me a message, I'd love to know what you think of my card, well besides the little mess ups.  hehehe.  Have a fantastic Friday and Mahalo for stopping by!

Hugs,
Leanne


Supplies:
White Neenah paper, black Recollections cs, dp scraps, circle & teardrop scalloped circle spellbinders.


Lilo's Fun Friday #14

Happy Aloha Friday everyone and a big WELCOME to my newest friends!! :)  I'm so glad you're here and I hope you enjoy browsing around.  :)  I wanted to say thank you all for your wonderful comments on my last few posts.   I know sometimes it's hard to read through everything, I have the same problem sometimes, so I really appreciate that you are interested in what I write.  :)  I hope you all get a chance to create some candles too, like I mentioned it's super easy and can be addicting, just please give credit to Lydia Bancroft, she really deserves it for sharing her awesome tutorial.  :)

Now I was trying to decide what to do for today's LFF #14 share and since I'm still in candle fun mode I thought I would do another one with one of the Sister Stamps.  :)  Speaking of Sister Stamps, make sure you stop by the Sister Stamps blog to see the amazingly cute Valentine's day previews and you'll also see who the guest designer is.  She's a favorite of mine and she rocks the Sister Stamp images.  You also have a chance to see Debi's amazing previews, she's been busy helping out Jenny on the Sister Stamps blog as well as her own!  She's awesome!  :)  Lastly Jenny is generously giving away the new releases to some lucky commenters, so head on over here to check out the rules and sign up.

Alrighty, since Valentine's Day is coming up I decided to try my hand at my first Valentine's Day project.  I was fortunte to receive a very awesome set of water colored pencils (special delivery from Switzerland) for Christmas.  Big thanks to Renate, Zach, The Winters (Renate's parents who brought them back from Switzerland), Darnell, Kat & Char!  So now that I had my coloring medium I had to choose a stamp.  I picked Yoko because she had the best accessory with her fishing pole.  How fun would it be to wipe away the crane she usually comes with and add a heart to the end?  Pretty cute. 


Here's the heart I added by wiping away the crane :)
It turned out a little bit lighter than I expected but still cute!  I don't know if you can tell, but I did use a Copic marker here.  After I finished heat setting her, I didn't like how her hair turned out so I experimented with coloring with a Copic marker on wax.  It turned out a lot better and now you and I both know that you CAN color on wax with Copic markers.  Although I wouldn't try to do it like you would on paper, the ink might transfer from one marker to another especially if you are using a light and dark combo.  I think I'll experiment with coloring with markers next.   I kept the back blank in case I wanted to either add another image or sentiment, so I just decorated the bottom with a really pretty pp (Brambleberry blossoms - Imaginisce) and some white rafia.

See the  glass stand the candle is on?  Well I got it for a $1 at the Dollar Tree!  Score!  It makes a really nice stand and when turned over it would probably make a really nice bowl.  Alrighty, I'm gonna finish up a card I am making for the Tiddly Inks blog hop tomorrow.  If you have time, here are the details, it should be a lot of fun!  Have a good evening and if you made any candles please leave me a comment and link to your direct post.

Mahalo for stopping by! Have a fantastic Friday!

Hugs,
Lilo

Supplies not listed above:
Copic marker: 100
Memento Tuxedo black ink
White tissue paper
Candle (Joann's)

Thursday, January 12, 2012

Candle Fun!

Hello!
Hoping you're having a good week.  So far it's been a pretty cool week for me.  Work is not so stressful this week and I had a really fun craft session with my work buddy, Kathy, Tuesday night.  The result of our efforts is what I wanted to share today.  I'm going to TRY not to make this too long, but there are no guarantees.  I understand if you just scroll through without reading, I have plenty of pictures .  No worries, just so happy you stopped by to visit me.  :)  Please make sure to stop by Kathy's blog and leave her some love too.  :)

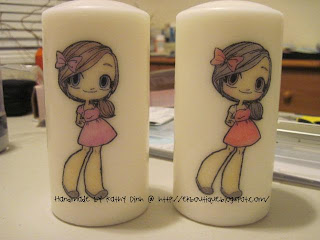
During Christmas I saw a few of these wonderful images on candles popping up here and there and I REALLY wanted to make some of these for Christmas, but time ran out.  :(  I asked Kathy if she wanted to experiment with me and she said of course!  hehe, she likes to experiment as much as I do.  I found an easy tutorial on the Digi Bell DT blog by Lydia Bancroft and made sure I bookmarked it for later when I would have time to work on one. 

The supplies: Good sized candle, white tissue paper, stamp of image you want to use, coloring medium (markers, colored pencils), wax paper, embossing heat gun.

Lydia's tutorial incorporates how to print digis on tissue paper (pretty informative) and then add them to the candle.  She has pictures with detailed instructions.  Kathy and I decided to use rubber & clear stamps for our first attempts.  We didn't want to try to use our Copics so instead we used colored pencils.  Believe me it was a good choice, I'll tell ya why later on.  We both chose our images, she chose Sweet Thinkin' Mae from Some Odd Girl and I chose Birthday Monkey from C.C. Designs.  We inked our stamps with Memento ink (Black Tuxedo) and stamped it onto the tissue paper.  We then started to color.  (Tip: Make sure if you have some extra sheets of scratch paper underneath the image you are stamping & coloring. It helps create a good stamped image as well as smoothe strokes when using colored pencils)  When we were done coloring we followed the rest of the steps: cutting out our image, placing our image on to the candle, put the wax paper over it and gently heat set it.  Kathy went first and we were both so excited at how fast it took to heat it.  The cool part was seeing the image melt into the candle!!  SO COOL!!!  I noticed that you can put your image on colored side up or down.  Either way it picks up all the colors.  It just gives you another option to flip your image which is what I did.  Here's our first images, me up first:


Hehehe, he turned out so cute!  Here is Kathy's:


Doesn't she look awesome?  We both were super excited to get our first ones done and friends, let me tell you, it took us a total of 15 minutes to do this!  From picking the image to heat setting it onto the candle!!  So easy and fun.  Kathy did another one using the same image, but colored her differently. 

Here they are side by side:

I went a different route.  I decided to add the same cute monkey to the other side of the candle and I colored him a bit different.  This time I flipped him with the colored side up then heat set him.  Much more vibrant yea? 


Here we are side by side:

When I got home I had already decided that I was going to gift my candle to my cousin's son who is turning 1.  My parents are going to LV to attend the party and I'm sending this little guy with them.  I wanted to add his name and maybe write Happy 1st Birthday to commemorate the occasion.  So I used a Copic marker (and this is where I was so glad I had scratch paper underneath the tissue paper) to write his name, it looked really cool.  When I picked it up to cut it out I noticed that the ink had gone through to the scratch paper as if I wrote on that paper!  Whew, luckily I had that extra piece of paper to catch the ink, else I would've had to explain why Aaden's name was "tagged" on the dining room table!  LOL!   Anyhoos, I know when you transfer words you would usually write it backwards, but this time I heat set it with the ink side up.  Worked out perfectly!  And just below I wrote Happy 1st BIRTHDAY!


Now I didn't want to just send the candle without a card, so I made a small card to go with it.  I used the same cute Birthday Monkey, my newest Spellbinder, star circles, regular circles, C.C. Cutter balloons, distress inks and some twine to create this card.


I am so happy with this card.  So bright and cheerful.  The frosting on the cupcake turned out better than I expected.  It's actually two different colors, B21 on top and BG11 underneath.  I don't think Aaden will know what it is, but hoping his mom and my cousin will like it.  Here are a couple more pictures (stay with me! I'm almost done! ~ hehehe) of the candle & card, can you see the cupcakes peeking out from the sides in the first picture?  :) 


I'm probably going to dress up the bottom part of the candle with ribbon so it doesn't look too plain.  As expected, I dressed up the bottom of the candle not with ribbon but found some corrugated paper and a blue piece of rafia. 


Whew, and there you have it!  A 30 minute candle project, an hour card project and this post - all pau!  If you're still reading this you are so sweet, Mahalo! 


Alrighty, I'm tired now, so I'm going to get something to drink and maybe veg in front of the tv for a bit before heading to bed.  Have a fantastic Thursday!!

Hugs,
Leanne

Supplies & Copics:
Distress Inks: Vintage Photo, Wild Honey & Crushed Olive