Monday, March 31, 2014

You are SEW sweet

Hello!

I'm popping in for a quick spotlight for Kitty Bee Designs.  This cutie is Sewing Kit.


I am planning to give this to my friend who loves sewing and kitties.  This image was purrfect for this combination.  (hehe)  I used some really old patterned paper from DCWV - the CRAFTY stack, yep that's me trying to use what I have, and went with a really simple layout.  The  circles are stitched circle dies from MFT, (love these).  The sentiment is computer generated and I added a button with some twine to tie it all together...  If I could have gotten my sewing machine working I would have stitched this, but instead I used a sewing tracing wheel, yep and it works just as well as a piercing tool, just a lot easier.  To color I used Copics.  The pin cushion looks exactly like the one I used to have when I sewed a lot.  Will definitely use this image again for a card for my grams.

You can find some adorably cute images in the Kitty Bee Designs Etsy store, unfortunately this one is not there but I had to use it cause it was too cute not to.  Thanks for stopping by, have a great day!

Friday, March 28, 2014

Aloha Friday Challenge #20

Woo Hoo!!  Happy Aloha Friday!

Today starts a brand new Aloha Friday challenge at Kitty Bee Designs.  This one should be good fun!

PLAY PRETEND
(Show image in costume or doing something job/hobby related)
Our awesome sponsor this week is:


Some of the cutest stamps out there.  Thank you Heidi for sponsoring our challenge!  Make sure to stop by the challenge blog to read the prize info and details of the challenge.  You'll also get to see how the rest of the Bees are playing pretend.

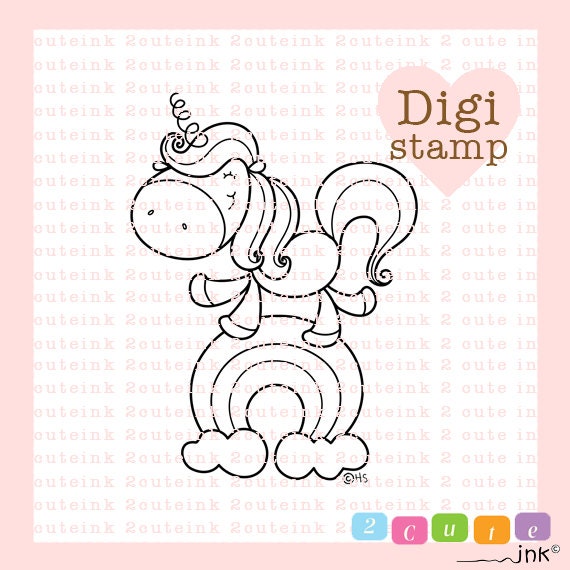
Today I've got two projects to share using the same digital image, Lucky Unicorn.

Lucky Unicorn Digital Stamp for Card Making, Tags, Paper Crafts, Scrapbooking, Hand Embroidery, Invitations, Stickers, Cookie Decorating

Kawaii, right?!!  Makes me smile.  First up is the challenge inspiration card.  Now mind you I was going for playing pretend, k? >.<  Meet Zebra-corn...


Get it?  Unicorn incognito as a zebra?  hahaha...  I know I tried my best.  I actually like how it turned out, something different from me that's for sure.   How about a different angle?


When I finished coloring I was pleasantly surprised on how cute the black and white stripes turned out.  It really seemed to work.  :)  The clouds were created with a stencil and Distress Ink Tumbled Glass.  The green tree with the yellow flowers is a Kodomo rubber stamp.  I used DI Peeled Paint for the green part and Copics to color in the flowers.  The grass was cut with a Fiskars grass border punch and the paper is scrap from a recent project.  Once I popped on the butterflies and the sentiment I said to myself, Stop!  The scene is pretty complete if you ask me.  Zebra-corn agrees...  hahaha!  BTW, I kept the rainbow to use for later...


Now here's the other just for fun project, a tag, using the image as it was meant to be...


Aww there's the cute lucky unicorn and remember I mentioned using the other rainbow later?  Well here it is.  It was fussy cut and then popped up on to the other rainbow with pop dots to give it a little bit of a 3-D effect. The tag is MFT, and the scene is pretty self explanatory.  The sentiment is computer generated and I colored in the RAINBOW and RAINBOW word with you guessed it rainbow colors.  The clouds were created the same as above.  I used the same rainbow Copic colors on the button to sort of mimic the rainbow below; added black white white twine and a black sheer ribbon from my stash.  Here's a close-up of the rainbow...


I used a white gelly roll pen (by Sakura) and added whimsical dots to the rainbow.


Well that's a wrap for me, don't forget to read the rules before linking up to our challenge and have fun! Looking forward to seeing what you create!  Mucho Mahalos for stopping by today, have a fabulous Aloha Friday and a great weekend!!

Hugs,
Leanne
Team Bees for Kitty Bee Designd DT

Monday, March 24, 2014

Happy Birthday Makinley!

Morning,

Hope you all had a great weekend.  I got a chance to color some images for fun.  One of them was the first from the Super Secret Stamp Club from The Greeting Farm and her name is Fairest. One of my good friend's youngest daughter just celebrated her 3rd birthday and via FB I saw they went to Disneyland to celebrate.  Aww the happiest place on earth is the place to go to celebrate any birthday. I thought it would be fun to color Fairest as Snow White, but when I put together the card itself the colors did not match.  So I stamped another image of Fairest and colored her to match the card.


I'll just have to figure something else out with the original Snow White version.  I did a couple slight alterations with Fairest, do you see them?  If you guessed the cupcake then you are correct!  The cupcake is from Sister Stamps Miyoko.  I love how the stem & leaf from the apple that Fairest is originally holding works perfectly with the positioning of the cupcake.  It looks like it was made for this image.  I also added some bows to her shoes using a Memento marker.  As I was trying to figure out a layout I remembered a card that my KBD teammie Shirl created and thought it would be fun to make for the first time.  Thanks for the inspiration Shirl! :)


It's called a building block card.  I found the tutorial on Splitcoast Stampers.  The only issue I had with this was after cutting the building block part, it did not want to close flat so I had to make a couple of adjustments.  All in all it turned out really cute.


I'll need to do a few more of these to get the cuts right.  The Happy and Makinley letters were cut with CC Designs Cutter Bubble Alphabet dies and the birthday letters are cut from MFT Dienamics Little Lowercase letters.  The card is white cs from Neenah, the hot pink cs is from Recollecitons, the patterned paper is from my current go to girly paper, Colorbok (Confetti).  The yarn is from Daiso, the pink button is from Recollections and the twine is from Taylored Expressions. I used a Swiss dot embossing folder for the pink squares.


Gonna pop her in to the mailbox today and hopefully Makinley will like it.  I have another project I used Fairest on as well as the second SSSC release, Tress, that I will share later, later.  For now, I hope this card made you smile.  I'm hoping to send out more birthday cards, even if they are late cards, to my family and friends.  I have quite a few that are coming up, so better get back to coloring and creating.
Thank you all so much for stopping by and leaving your wonderful comments, you're all so sweet!  Have a fabulous Monday!!

Sunday, March 23, 2014

Happy Birthday NBFFD!

Hello!

I made this card using Misaki from Sister Stamps, read all about her here & here.  I think release #20 is up there as a big time favorite and I can't wait to share some other projects I created with the other two images.   There are a total of 3 really adorable Girl's Day stamps that can be used for any occasion.  You can read all about them here...

I needed a birthday card for one of my co-workers and I needed it quick!  I didn't have a lot of time to make this so I tried to do as much as I could at home first before heading to work.  I took a picture of the layout before I headed out...

https://blogger.googleusercontent.com/img/b/R29vZ2xl/AVvXsEgmU8PofVFOfSRs7RYVh9nucaC80OT92pdm3E6m_bLNXfAfj9y5BCW5XOxR4WSKdswAg-zR4nQpMy2xmBFlVgVSvvHH59VNktD78pfBD5Jwqzu2O9bA8JmOgkXCUKp4ScT6sBDK4_HNsLw/w625-h469-no/CYMERA_20140222_113445

Once I got to work I quickly colored up the two birds and Misaki.  I went with a nice spring color palette to go with the wonderful warm weather we are having in So Cal.  Here's the finished card...


Whoa, what a difference some color makes yea?  I matched Misaki's outfit to the yellow flowers and peach patterned paper.  Decided to color the birds a similar color.  Added a double looped sheer white bow and had some fun with some scraps of the same ribbon right below the larger flower.  Here's a close up...


How about a bird's eye view?  You'll see how the ribbons fluff off the card.  (haha)


Another close-up to share...


Oh I really like ^ this shot, it looks like a tag... hmmmm... (hehe)


Well folks that's all I have for today.  Hope you're enjoying the weekend and getting in some time to do something fun.  Enjoy the rest of your Sunday!!  Thanks for stopping by!

Hugs,
Leanne

Saturday, March 22, 2014

Faux Stitching

Hi ya!

Today's card is all about faux stitching.  I'm so not the kind of gal who'll pull out the sewing machine, for a card, but I envy those talented ladies that do.  I can't sew straight (much to my grandmother's dismay) but boy my faux stitching is pretty awesome! It's also much straighter than my regular sewing and it's so much faster!  (hahaha)  I'm glad I finally finished this card.  It was just waiting for the right layout and it came in the form of the current Deconstructed Sketch.  It made me smile when I was done.


Today's card features Winter Yumi.  I've been on this blue and green kick for some time now.  (They are two of my favorite colors) and once I figure out what to do with the other colored images I'll share.  As you can see I've done faux stitching on almost every part of the card as well as Yumi's hat.  The patterned papers are scraps from K&Company (Jubilee) & Confetti by Colorbok and I like how the colors seems to pull together even with the hot pinks.  The sentiment stamped on to the white banner is from Make It Crafty and yes I faux stitched it with blue ink. hehehe...


Anyone playing in any of the March Madness pools?  I stopped doing that several years ago since I don't watch college basketball like I used to.  I have no clue who's good or bad nowadays and you can't always rely on the #1 team making it to the finals as they always seem to get knocked out early. (Knock on wood)  Well good luck to you if you are.  Hopefully I'll get to watch a few minutes of some of the games in between enjoying the weekend, but for now, I'll settle for getting this post up.  :) Okie dokes, thanks for stopping by today, have a terrific day!

*Seize the Birthday challenge

Friday, March 21, 2014

LFF #69 - A quartet of mini calendars

Hello!

Happy Aloha Friday everyone!  Don't forget to check out the newest Kitty Bee Designs challenge which starts today.  Stop by to see what the Kitties are up to and our new sponsor.

The Bees are off this week so it's a perfect day for another LFF (#69) share.  Hope you're not too tired of seeing a few more mini calendars?  Aww, I hope not (hahaha)  I sent these with my parents to my mom's cousin's family reunion.  I still have a few more calendars left, making good progress though.  For these calendars I inked up some of the boy stamps from Sister Stamps.  I know we all love the girls, but the boys have their own cuteness too. Using the Tim Holtz Sizzix postage stamp die was perfect this time around.  Here is a preview of the 4 I was able to make in under an hour:


I had a lot of fun making these.  When you're under pressure you hope that you don't have to worry about accidents or mistakes. (hahaha)  I totally got lucky.  So let's get started..  First up is Katsura.  You can read all about him here.


He looks like he's about to get blown away yah?  hahaha...  He's holding his own.  The patterned paper is from Bo Bunny - Serenity collection.  I fussy cut the koi fish kite and Katsura after coloring both.  Then I stamped him on to the waves paper and glued down the pieces.  The sentiment is computer generated and means several things, but for this one I wanted it to mean amazing. :)  Next up is Kenichi.  You can read all about him here.


This is one cute stamp right?!  Had fun coloring them both.  The patterned paper is from the same Bo Bunny Serenity collection paper pad.  I tried to cut it as close to the corner to include a lot of the leaves.  The sentiment is another computer generated one.  Makes me smile to see how happy they both are.  Up next is Yoshi and you can read all about him here.


I have to say that he's one fun image.  You can pose him standing, but I thought it would be fun to have him in the middle of his cartwheel.  Wheee!!  The pattered paper is from MME Lime Twist.  I could have used any in the paper pad, but the kites seemed perfect.  Last in the quartet is Yoichi, you can read all about him here.


Oh boy this was one fun image to color.  It's much better looking in person.  The patterned paper is from the Basic Grey Konnichiwa pad.  It might look like just a red piece of paper, but there are kanji symbols decorating it.  Like I said it's much better IRL.  Tried to keep the colors in the gold & black realm and I love how the red makes the image pop.  The sentiment is another computer generated one. 

Only 3 more calendars left, now I just have to finish them.  Once I do I'll share and then you won't have to worry about anymore until later in the year.  Thanks for stopping by!  Have a great Aloha Friday!

Thursday, March 20, 2014

Altered clothes pin

Hello!

Happy 1st Day of Spring!!

Hoping you're actually enjoying some spring weather and not still battling winter.  We've been enjoying some warmer weather and looking forward to the cool down (70's - 80's) this weekend.

I'm sure I'm not the only one who has alterable objects just waiting to be transformed in to something crafty and amazing, right?  I've got a blue clothes pin/picture holder (thanks Kathy) and it's been bothering me that I haven't done anything with it.  Mind you I'm not the altering type, but last night I decided to do something about that.  (lol)   I'm kinda excited to share this project.  After much hemming and hawing (OMG does anyone say that anymore? hahaha!!)  I came up with this...


Ta-da!!  :)  I turned it into a really cute photo holder.  Oh man, when I was done I couldn't stop smiling! This totally made me happy!  I was so hesitant with adding the flowers and the other elements then convinced myself that I should definitely take a chance and just go for it!  So I did and it was the best decision I convinced myself to do.  (I know its the little things, haha)  I used a lot of my stash to finish this and am so proud that I did.  I did use a new stamp, Double Cupcake Anya, from The Greeting Farm, but in my defense I've had it for awhile now so it goes in to the use what you have category.  :)  Isn't she adorable?!!  You really can't go wrong with a classic looking Anya stamp.  I took some close ups so you could see more details...


I thought it would be fun to use a doily on the back side of the clothes pin to give it a 3-D matte affect (yes I just made that up!)  I added yellow and aqua blue cardstock behind each doily to give it more color.  I used some aqua blue resin roses (Recollections) and that yellow sparkly flower (Prima) has tons of glitter.  Ai-ya there was glitter EVERYWHERE!!  (hahaha)  I would like to point out the stitching on the wooden piece. I used my white gel pen to do that!  I really like that detail, and on top I continued the stitching and added a heart. :)

In this next photo you'll see a close-up of the flat-backed pearls which I colored with Copic BG49.  You can also see how I fussy cut the computer generated sentiment and popped it up with dimensional foam tape.  I love that font (Heartbreaker), and when you fussy cut it leaving some white space around it the effect looks so cool! (yep, that's just my little ol' opinion - hehe) 


When I decided that I would add a doily on the back I wanted it to be sturdy enough so that it wouldn't tilt forward because it was so front heavy.  I had some leftover cardboard (not chipboard, I wanted something sturdy and chipboard was not going to cut it.) I really didn't want to cut 2 pieces of blue cardstock and have to glue it down to both sides of the cardboard so instead I did this...


Ta-da!!  Something super simple was what I was going for here.  Who says the backside can't also be cute? Not me! (haha)  I used Distress Ink (Vintage photo) to not only stamp Anya, but also to distress ink around her.  I kept the die on so it would give it a nice frame.  The die cut is a little bit smaller than the doily so you can also enjoy a little bit of the lace part.  I colored parts of her in with a Versa Mark pen and accented with a white gel pen.  The sentiment (from Make It Crafty) reads, "Wishing you the BEST day EVER!!"  Now that I think about it I could have done some doodling around the frame, maybe for the next one...  Yes I plan to make another one, or two...


I'm so happy with how the front as well as the back turned out because no matter which way you look at it all you see is cuteness. :)  That's all for me today, thanks a lot for stopping by!  Enjoy the rest of your day!!

*Seize the Birthday challenge

Here are the supplies:
Double Cupcake Anya rubber stamp (The Greeting Farm)  
Sentiment stamp (Make It Crafty)
Enjoy sentiment - computer generated
Aqua blue clothes pin (Michael's)
2 different sized doilies (Smart & Final (bigger one) & Bo Bunny (smaller one)
Yellow & aqua cardstock (Recollections) to back the doilies
Scallop circle dies (Lifestyle Crafts)
Flat backed pearls (Recollections) which I colored yellow and aqua with Copics (Y04 & BG49)
Aqua blue resin roses (Recollections)
Yellow sparkly flower (Prima)
Heart banner (LLLC)
Distress Ink - Vintage photo
Memento Ink Tuxedo Black (Tsukineko)
Copics: various (Sorry I didn't write any of them down) 
Versamark pen
White gel pen 
Dimensional foam tape - (Recollections)
Double sided tape - (Daiso)

Tuesday, March 18, 2014

Fairy Fae Birthday Card

Hello,

Back with another card featuring Tiddly Inks Fairy Fae and one of the three frames from the Frame the Moment set.


After I merged both images I printed it off and started coloring, still needs tons of practice.  I need to figure out how to have a light hand when I color or else I won't be able to get those finer strokes down.  "Think light as a feather" (hahaha)  Before I forget, I did fussy cut the frame and cut off the "wiring" which would be used to hang the frame it would have make the card bigger than it already is.  To compensate I matted it to a black scalloped square which incidentally looks right at home.  For a bit of bling I added the four clear crystals. The designer paper is from Prima and I was so happy to see it matched the colors in the image.  The sentiment is computer generated.  I had fun putting this one together with the pretty purples as it's not a color I use very often, but I know there are a lot of people who love it so getting used to it is a must.  :)


This card is going to someone who likes purple and although it's late I hope she likes it.  Thank you again for coming by.  Have a wonderful day!

Monday, March 17, 2014

Luck of the Irish

Morning and Happy St. Paddy's Day!

I have a fun 1 layered card to share featuring a cool freebie from Christy at Tiddly Inks.  If you're not part of the Tiddly Inks FB fan page you're missing out on getting to know a nice group of talented ladies.

I believe her name is Chloe and she's all about shamrocks and fun.  She'll be popping in to the TI store very soon.  As today is St. Patrick's Day I went with a semi-monochromatic theme. 


Isn't she sweet?!  After coloring her up I added some green glass dots with a Viva decor pen.   For the bottom of the card I used scallop border die and added some patterned paper for just a wee bit of fun.  Also used the same Viva decor pen to add little pearls to the scalloped edge.  To top it off I had printed out that sentiment, and as I was going through all my sentiments that one dropped out!  Love when that happens. :)  The patterned paper is from the Emerald stack by DCWV.


Looks like I'll be able to sneak this in to the Green challenge over at the TI challenge blog.  In the meantime, have a great day!

SWEET!

Sunday, March 16, 2014

Hello Alice

Hello,

Hope you're all enjoying your Sunday.


This image is Alice from a fairly new stamp line called Jess College Fund.  You can read all about Jessica's journey to earn funds for her college tuition and see how you can help her.  It's pretty ingenious and I applaud her for her creativity.  Plus her images are awesome, affordable and cute!!  

Here's the project I've been working off and on with and I'm thinking I'm done with it.  (lol)


It started off as a card, but ended up as a box.


After coloring her with Copics I masked her off and used a Tim Holtz background stamp from the Heartfelt line to decorate the backdrop.  Used Distress Ink iced spruce to ink the background and distress the edges.  Added some floral bling here and there and a computer generated sentiment which I fussy cut.  The strip of pink patterned paper is from the Prima, Meadowlark paper pad.  I used it to decorate the sides of the box, both top & bottom and also a strip went inside the box.


Jessica recently opened her own challenge blog so I think I'll support by joining in the current challenge which is titled "Bling" and maybe in the process be lucky enough to win some new markers that would fit perfectly inside this box.  (hahaha)  :)


Have a great day and thanks for stopping by!

4/11/14 update: Winner! 

Friday, March 14, 2014

LFF #68 - More Mini Calendars

Hello!  Happy Aloha Friday!

Time for a new Lilo's Fun Friday (#68) share and today I think I'll share some of the mini calendars I made for my mom's co-workers.  I have been enjoying seeing all the mini (and big) calendars Eva has been posting (she's already got 2015 calendars up!!) and that encouraged me to finish using the rest of the calendars I have left even though 2014 is already in March.  Thanks for the inspiration Eva!

These are all CAS and were definitely easy to put together.  I used the TH postage stamp & the Stampin' Up Top Note Sizzix dies for the bases (backing them with chipboard to make them sturdy) and picked pretty colorful patterned paper (from my un-used stash) for the backdrops. The calendars are from Taylored Expressions.  For the images I used the Girl's Day stamps from Sister Stamps which were small enough to fit in the space above the calendar.  They are all colored with Copics with some hand-drawn designs for all the outfits and popped up with dimensional adhesive. The sparrows were colored to match but in lighter tones.  Here's a preview:


First up is Misaki with her little sparrow friends. You can read all about her here & here.


Isn't she sweet?!  I love how she's "flying" and can totally hear her singing a song along with the sparrows.  I used a multiliner pen to add some designs to her kimono and bows. The patterned paper is from the Bo Bunny, Ambrosia collection.  Next up are two of Harumi.  You can read all about her here.


Another sweet little girl image & look Misaki's sparrow friends!  I used a multiliner & white gel pens to add a little design to her kimono and bow. The patterned paper is from the Bo Bunny, Serenity collection.


As you can see there is a little bit of a theme going on here...  I added the sparrows instead of a sentiment because I thought they were just too cute not to include them, plus they fit perfectly next to each image. :)  I used a multiliner & white gel pen to add some design on to her kimono & bow.  The patterned paper is from Echo Park, Happy Days by Lori Whitlock.

The last two calendars are of Minako.  You can read all about her here.


She is a little bit bigger than the other two, but just as sweet.  I love how it looks like she's listening to the sparrows and enjoying what they are telling her. (hahaha)  A white gel pen was used for the design on the top of her kimono.  The patterned paper is from MME On the Bright Side.  Here's the last and possibly my favorite one.  I almost didn't want to let it go which is weird because this is well really girly! hahaha!!!


I think it might be because of the doodling I did on her kimono with a red American Crafts Memory marker.  At first I did a few swirls but it just didn't look finished to me, so I kept going and couldn't stop.  Once I was done I was so pleased!   The kimono is actually yellow underneath the red pattern.  I also love the patterned paper I picked which is from Echo Park, For the Record by Bella Road.

Well this was a long enough post yea?  Hope it was worth the read.  Mahalo for stopping by.  Have an awesome Aloha Friday and weekend.  

~Lilo