Showing posts with label Alyce. Show all posts

Sunday, July 27, 2014

Happy Day - Festival Lily

Hello!


Hope you're having a nice weekend.  Thanks to Alyce from Kit and Clowder I got to play with a lovely free digital image created by the very talented Wendy Burns, owner of All Dressed Up.  Her name is Festival Lily and if you're a part of the Kit and Clowder Facebook community you'll have already received and participated in the coloring contest using this beautiful image.  


Here's the card I made, love how girly it turned out.


Had a bit of fun with a new photo editor, Pixlr which created this very cool glamour shot.  I must say it makes my card look very professional...  (lol)  I love how soft & kawaii it makes everything look. Sorta whimsical just like this image.  Here's my coloring before the glamour shot in case you wanted to see the flaws, I mean the difference. lol...


That's all I have for now, enjoy the rest of your weekend and as always, Mahalo for stopping by!

Supplies used:

  • Festival Lily digi - All Dressed Up
  • Essential backgrounds Text style clear stamps Product # LVB297 - Whiff of Joy
  • Patterned papers Lyric & Fairy Rhymes, flowers Lucille Song Bird #555597 - Prima Marketing
  • White Neenah cardstock
  • Die-namics Mini Album Squares, Dainty Dots border  - MFT 
  • Designer Mini Tags, leafy branch, burlap twine natural - Taylored Expressions
  • Sentiment, sequins - Winnie & Walter 
  • Open leaf flourish die - LLLC
  • Laser cut wood butterfly - Recollections
  • Handicraft lace - Daiso Japan
  • Distress inks: Tumbled glass, walnut stain, stickles - Tim Holtz by Ranger
  • Versafine Vintage sepia - Tsukineko
  • Magic Perlen Pens: transparent blue & transparent - Viva Decor
  • Copics:
    • Skin: E000, E21, E00, R30
    • Hair: N7, N4, B24
    • Dress/butterflies: G0000, G000, G00, G02, YR00, E30, E31, N3, N1, E11, YR82
    • Outline: G000

Monday, March 10, 2014

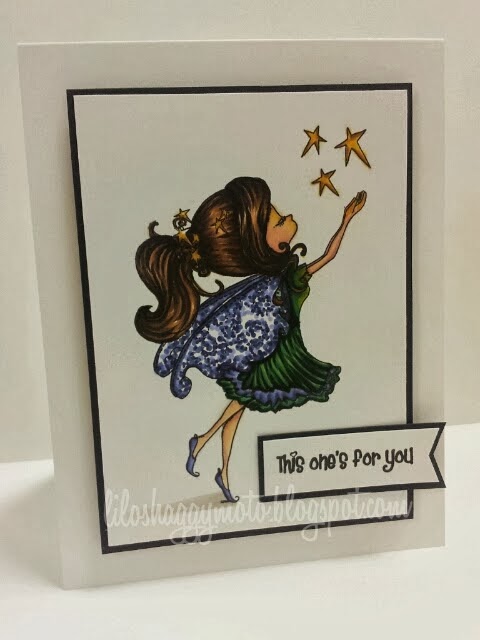
Fairy Fae Catches a Star

Hello,

Oh boy is anyone else out there dragging from the time change?  I feel like I've lost more than an hour and feel like the day is just running away too fast.  Hoping to get used to it as we've got to for the next several months.  Ai-ya!

On Saturday, I joined several other ladies from all over the globe to do a coloring along with the fabulous Alyce of Kit and Clowder.  If you are not a part of the Kit and Clowder following your missing out.  Alyce recently started her own website where you can learn to techniques in Copic coloring or learn some tips and tricks to add to enhance your skills.  She also offers classes on the basic colorings and will give you feedback if you purchase any of the coloring classes.  Click on the Kit and Clowder banner on my side bar to jump to her website and sign up.   You can also find her on Facebook by typing in Kit and Clowder in the search bar.

I have been a fan of Alyce's since I first saw her on the Make It Crafty team.  She has since grown in her coloring skills to become a master Copic colorist, IMHO, and each time I see her finished projects I swoon.  hahaha...  Anyhoos, I hope you'll hop on over to her blog and then her website to check it out.  This was the first time I tried a color-a-long and it was quite fun.  She's really patient and although she really didn't want to reveal too many tips was able to get us all through to the end, with lots of laughs in between.  We worked with the beautiful Fairy Fae Catches a Star from Tiddly Inks.  Here is my end result...


If you have an eagle eye you'll see the big mess up on my coloring even though I tried to hide it.  I've been trying to go back in with the colorless blender to fix it, but it just kept getting messier and started to spread. As with any other mistake I try to hide it, this time with Distress ink.  :)  Not too bad of a job, but you can still see it.  =.=  As soon as I figure out what to do with this one I'll share the finished project.  Oh, I accidentally spilled a drop of water on the lower right corner so I ended up spritzing the rest of the card with water that is why it looks a bit warped and distressed even more than normal.  I actually like it. :)

I learned about highlights, and the "dreaded" pleats, I think I did ok for my first go.  Oh and I learned what stippling is and hope to use that technique in future projects.  Yes, this girl definitely needs lots more practice!  (hahaha) But not too bad.  I wanted to keep practicing so I did another coloring which didn't turn out as nice as the first but I do like how the pleats turned out.  And lo and behold not too many mistakes.  Woot!  I was so happy with how it turned out (well except for the wings, not as defined as the first one) this one went on a card right away.  


I have one more that I wanted to share.  This one is with the same image, but different colors.


I have been enjoying the color combo of blue and green lately.  So I had a bit of fun with her with this tag.  Not too happy with the dress, but I do like how the hair turned out and I did some stippling on the top of the tag.  All in all a fun bit of coloring.  Will definitely keep practicing and sharing.

Thanks for stopping by and if you read this til the end you're very sweet! >.<  Have a great evening!!

Friday, December 7, 2012

LFF #49 - Mariko, Wishing you...

"a Merry Christmas and a Happy New Year"

Happy Aloha Friday everyone!

Does anyone else feel that this month is going by too quickly?  I need to get going if I want to do what I need to do!  Yikes!!  hahaha!  Who else is scrambling to finish off their projects?  For those who are done or almost done I envy you!!  {hehe}

Here is another completed Christmas card, yay!  Featuring Mariko from Sister Stamps and some beautiful MIC chipboard.  She is the perfect image for any celebration. 


I colored her up with lots of red and left parts white.  Her hair was fun to color as well, I used Copics E55, E57 and a little bit of E59.  That's another thing I love about Sister Stamps, their hair is so fun to color!  The first being that they are so darn cute!  The chipboard is part of the Holly Oval frames and Ornate corners sets and boy are they awesome!!  I colored them both first with a white pencil and then with Copic markers, I read about that on Alyce's blog and wanted to try it.  Check out her awesome page, she's one amazing crafter!!!  The holly leaves are colored with a white gel pen, and the berries were colored with R46, Stickles & then diamond glazed.  The frame & corners are colored with E59 and I love how it looks like wood grain.  Don't know if that's the effect from coloring on to the white pencil or because my marker was acting up, but for whatever reason it made some cool woodgrain!  The swirls are colored with E57 and they also look like wood, but a slightly lighter shade.

For the rest of the card I matted two white pieces of cardstock to a kraft card which I distressed using white ink, on top of that is a red embossed piece of cardstock that is also distressed with white ink to soften up the edges.  On top of that is a small piece of cheesecloth which I also discovered on Alyce's blog.  The sentiment is from the Holiday Trinkets by Kraftin' Kimmie Stamps and it was stamped with white ink and then wet embossed on to kraft cardstock.

This card qualifies for the Yumi & Fumi Handmade December challenge because I used the theme colors, red, camel and white and I used a qualifying stamp.  Too bad I can't link it up, would love to try to get one of those awesome banners!  {hehehe}  But you don't have to worry cause YOU can link up, just follow the rules on the blog and enter.  The prize is awesome!!  For all the details click HERE


Okie dokes, there are a couple of you who have not messaged me their snail mail so please Heidi Brawley and Jazzmom please email me at quikhonu34{at}yahoo{dot}com so I can send out your prizes for past LFF posts.  As for the others I will be shipping them out next week.  Ok, for this week's LFF #49 giveaway I have a stamp and some other goodies to share, just leave me a comment and I will pick a winner and share on Monday.  Here's your question:  What are your "go to" Christmas colors this year?  I'm all over the place, but I've been loving the non-traditional colors like blues, lighter greens with dark reds and touches of white, and anything with kraft & white.  So many fun colors you can incorporate as long as you have the right image, papers or embellishments. 

All the MIC chipboards were purchased via SCACD.  Love this store and the customer service is da' bomb!

That's all for me folks.  Enjoy your Aloha Friday and have a great weekend!!!
Mahalo for stopping by!
Hugs,
Lilo